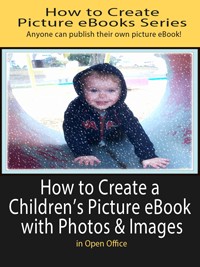
 License Type: Private Label Rights
  File Size: 13,348 KB
 File Type: ZIP
 SKU: 15997
  Shipping: Online Download
Ebook Sample Content Preview:
In order to publish your eBook in other formats, you must first format your Microsoft Word document appropriately. Thus, you'll have yourself a downloadable file (MOBI and EPUB) for the Kindle and iPad devices.
The layout and size of your document in Word should be vertical or portrait as eBooks bearing a landscape design will not be accepted for publication. Furthermore, if you want to put in images (pictures or graphics) inside your eBook, remember to resize them first using a small editor or Photoshop etc. You can then save these images and reinsert them into Word. Charts should be converted into images too in order for them to retain their original formatting.
Also, when using Microsoft Word, do not use text wrapping around images as they should be positioned in-line with the text instead. Another point to keep in mind is that the images included in the eBook should not be placed next to each other. That's because the type of layout then prepared will not work in favor of e-readers like Kindle or iPad. Also, avoid using any special characters or symbols unless it is absolutely necessary because there's a good chance that these characters may not be properly converted into the eBook formats if they're not part of a standard set of font. That is why many writers are told to choose fonts like the Times New Roman for the symbols and text.
Creating eBooks also means that you don't have to worry about any costs that will be included along with any illustrations or images that you want to add. For Word, you can simply insert images and illustrations by converting them into .jpg or .gif files. Programs such as Photoshop can help you enlarge, reduce, or crop images along with making other necessary modifications. You will also be able to save these files at a decreased resolution, thus the file size will be reduced.
Incorporating illustrations in your text is easy when you're using Microsoft Word but placing them in a precise manner could be a bit difficult than insertion. If your eBook requires a lot of illustrations or images (i.e. if it's a picture eBook), then using a program like desktop publishing would prove to be quite beneficial in making things work. Also, whenever you're laying out illustrations or photos in a Word document, try placing them in such a way that there's always an ample boundary between the adjacent text and the image. Captions should also be included where appropriate.
Page breaks should also be included between every chapter when using Microsoft Word. To do this, place your cursor right at the end of your text and click the page break option present on the insert bar. Indenting your paragraphs is also an important part of creating an eBook. To do this, you will have to click on the page layout bar and insert a measurement for first line indentation instead of using "Tab" from the keyword.
The Table of Contents or TOC of an eBook forms an essential part of the entire document because it's the first thing anybody would come across whilst reading your book. Therefore, be sure to put in a TOC using the reference table (there are a few styles that you could choose from). Moreover, your eBook should not contain any blank pages and the headings for every chapter should be written using the "Heading 1" option on your home tab. In order to activate your TOC within Word you will need the Heading 1 formatting set up on the headings anyway.
- File Size:13,348 KB
- License: Private Label Rights
- Category:Ebooks
- Tags:2013 Ebooks Private Label Rights


