 License Type: Personal Use
  File Size: 150,870 KB
 File Type: ZIP
SKU: 55135
File Type: ZIP
SKU: 55135  Shipping: Online Download
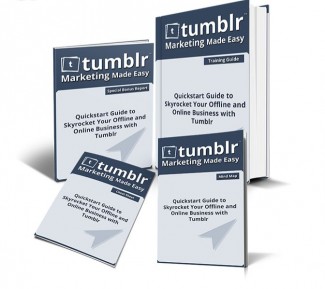
Ebook Sample Content Preview:
Step 3: Customize your Blog – Be professional
First of all, what you actually are going to do with a Tumblr Blog is build a complete blogging platform from scratch “BUT” without having to deal with code. Tumblr blogs are so flexible that you are even able to pick themes, you can even get into the code of the theme if you want, and edit a few things. And you’re also able to insert your own code to create a completely unique interface.
You certainly can do whatever you want in your blog but the final goal is to create something helpful for your customers and fans, something clear and not confusing, so I will show you what would be helpful for your clients and prospects.
Customizing your blog will depend on the Theme you pick as well. There are a lot of free and paid themes for you to install on your Tumblr Blog. There is not a set of specific components for you to be aware of, it will depend on the theme you pick, but let me give you some important tips depending on what you are able to edit with the theme you picked:
People will need to see what your Tumblr Blog is all about in just a few seconds.
Nicely describe your Business Purpose, special services and the real vision of your business.
Avoid the use of any kind of advertising material; use only images to get people to know what your Tumblr Blog is all about.
Use images that show what your clients or customers really want. Show the end result of your services right there in front of them. Just sell the benefits using images and not words.
Use colors related to your company logo, product, or any other kind of object you would be working with in order to satisfy those needs. Everything will need to be related to what you are offering or selling.
Place your logo, product, or a photo of yourself in the top area where people can see it right away.
The images should be clear and not confusing.
Avoid the use of long phrases or text that’s hard to read.
I will be using a specific theme as an example. Remember you are free to choose any theme of your choice, and several components of your customization will vary from mine. So let’s get started.
Once you are in your dashboard, you just need to go to the settings area, and you will see your first blog customization area right here, ready for you to start adding some details.
As you can see you are able to create more blogs under your same account. And also you just need to select them to get into their respective customization area.
You are able to edit several things in this area. You can take a look around and decide what to enable and what to disable based on your own preferences, but the most important ones are the ones on top: the Title, The Description, the avatar and the Theme.
In order to edit the first three you just need to click on any of them and start editing them. The avatar should be a square of 128 x 128 pixels.
In order to optimize your theme you can edit the default one which is the “Optica” by clicking on the “Edit Theme” button; or you can even look for a different one by clicking on “Find Themes”
I prefer to stay with this one for this training. Remember the customization will vary depending on the theme you chose.
Once you click on the “Edit Theme” button you will be able to edit several things in your blog.
The links are self-explanatory, here you will be able to have access to the source code of your blog and edit it (optional). You have another chance to change your theme. You will also be able to edit the title and description as well, and you are able to control some of the features of the appearance.
Here you have additional things to edit. You will instantly see what it would look like in the right side of the screen once you click on the blue buttons.
After your desired customizing is complete, remember to click “Save” in the top area. Then your customization will look like this:
This is the preview, it would look like this once you start posting but if you visit it live the posting section will be blank because you have not posted anything yet.
Great, this is how you customize the “Optica” theme’s blog. The customization will differ from the theme of your choice. I personally like “Optica”, but my intention is for people to concentrate on the posting more than themes and other things. Remember this is a social site, it is not a corporate website.
Ok guys, that’s it for customizing your Tumblr blog as easy as possible, so you can concentrate on the content more than on the design. Awesome! We are done with step 3. Now let me show you how to create a very important page for your blog.
Step 4: Create the about page - So people may trust you
There are a lot of things you can customize your Tumblr blog with but one of the things you really have to care about the most is on the “about” page.
This is where you will be able to explain in a few and simple words what your business or service is all about, and also it's an extremely important place where people will check out your business and services and if you are a serious business or not.
People know social media sites are free for everyone, so it is important for you to confirm that you are a real business in this area. Some important tips you can include here are:
Share some history about your company, when it was funded, your vision and mission, your services, etc.
Include where you are located, so people would know you are a real company
Share your website URL as well
Avoid putting all the focus on yourself, try to focus on the visitors
Share what your company can do for them, focus on their benefits
- File Size:150,870 KB
- License: Personal Use
- Category:Ebooks
- Tags:2014 Ebooks With Audio & Video Personal Use